8 Common Kawasaki KRX 1000 Problems (Complete Solutions)

As an owner of the powerful Kawasaki Teryx KRX 1000 side-by-side, you’ve likely encountered a few issues that required troubleshooting to resolve.
With a high-performance machine like the KRX, problems are inevitable, especially when pushing the limits of the vehicle’s capabilities. However, many common problems with the KRX 1000 are relatively minor and can be addressed with some basic mechanical knowledge and the right tools.
In this article, we’ll explore some of the most frequent Kawasaki KRX 1000 problems and provide practical solutions to get you back on the trail as quickly as possible. From electrical gremlins to engine hiccups to suspension setup, we have you covered.
Kawasaki KRX 1000 Problems with Solutions
1) Engine Problems
Engine problems are occasionally a problem with the Kawasaki KRX 1000. Here are some of the most typical engine issues to be aware of, along with potential fixes:
- A 999-cc, 4-stroke, liquid-cooled parallel twin engine powers the KRX 1000.
If you notice the engine overheating or see the temperature gauge in the red zone, it could indicate low coolant levels or a malfunctioning water pump. Check the coolant level and refill if it is low.
A lack of power or acceleration can signify dirty air filters, clogged fuel injectors, or ignition problems. Replace the air filters, clean the fuel injectors, and check the ignition coils for any damage. Faulty ignition coils will need to be replaced.
Have the clutch, drive belt, axles, and differentials inspected for any needed repairs or replacements. If the engine won’t start or is idling roughly, it could point to issues with the battery, alternator, fuel gauge pump, or spark plugs. Test or replace the battery and alternator, inspect the fuel pump and lines for damage or clogs, and replace old or fouled spark plugs.
By properly maintaining your KRX 1000 and addressing any engine problems early, you’ll keep your off-roader running smoothly for years of adventure. Be sure to always follow the recommended service intervals in your owner’s manual.
2) Fuel Injector Issues
If your Kawasaki KRX 1000 is experiencing issues with starting, stalling, or rough idling, the fuel injectors may need service or replacement. As the key components that deliver fuel to the engine, properly functioning fuel injectors are essential for optimal performance.
To diagnose fuel injector problems, first address another internal issue Check for any stored diagnostic trouble codes (DTCs) using an OBD2 scanner. Common codes for fuel injector issues include P0201 through P0208, indicating an injector circuit malfunction. You may also notice the check engine light illuminating.
Next, perform a fuel injector balance test using a diagnostic scan tool to determine if any injectors are malfunctioning or clogged. If an injector is stuck open or closed, it will disrupt the air-fuel ratio and engine performance.
With new or reconditioned fuel injectors installed, clear any DTCs from the ECU using a scan tool to reset the system. Start the engine and check for proper operation, fuel gauge delivery, and throttle response.
Take the vehicle for a short test drive to confirm normal engine power and acceleration before normal operation.
Properly diagnosing, servicing, or replacing malfunctioning fuel injectors on your Kawasaki KRX 1000 will help get your side-by-side back to peak performance and dependability. Be sure to also address any underlying issues that may have contributed to premature fuel injector failure.
3) Radiator Leaks or Overheating
If your Kawasaki KRX 1000 is overheating or leaking coolant, it likely indicates an issue with the radiator or cooling system that requires troubleshooting.
Check Coolant Levels
Initially, the overflow tank and radiator’s coolant levels must be checked.
- Fill up with purified water and ethylene glycol coolant in a 50/50 ratio if the levels are low.
- Fix the issue while low coolant is causing overheating.
However, if coolant levels drop again quickly, it points to a leak in the system that needs to be located and repaired.
Inspect Radiator and Hoses
Thoroughly inspect the radiator for any visible cracks or holes, especially along the seams and plastic end tanks. Also check the upper and lower radiator hoses, as well as the smaller hoses connected to the water pump problems and thermostat housing. Any damaged or swollen hoses should be replaced.
Pressure Test the System
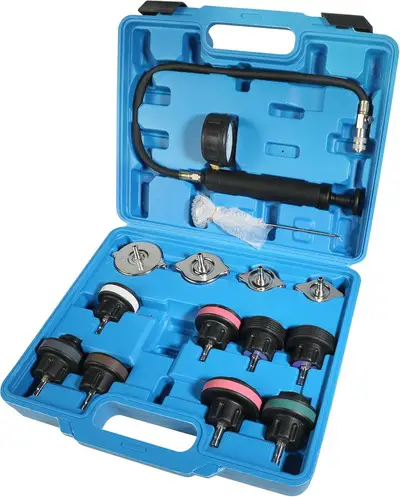
If no obvious leaks are found, you may need to pressure test the cooling system to locate the source of the leak. This involves using a pressure tester tool to pressurize the system and submerge components in water to detect air bubbles. Many auto parts stores rent pressure testers for a small fee. Replace any leaking components like the water pump, thermostat housing, radiator, or heater core.
Head Gasket Issues
In severe cases, an overheating or leaking engine could indicate a blown head gasket or leak. This will require an inspection by a certified mechanic. They can perform tests like a cylinder leak-down impression test to diagnose the problem. Internal engine repairs can be complex and expensive, so they are best left to a professional.
By systematically checking different areas of the cooling system and engine, you can determine the cause of overheating or leaks in your Kawasaki KRX 1000. Performing regular maintenance like coolant flushes, thermostat replacements, and water pump problems can also help prevent future overheating issues and keep your engine running at optimal temperatures.
4) Drive Belt Problems
One of the most common issues with the Kawasaki KRX 1000 is problems with the drive belt. The belt is responsible for transferring power from the engine to the wheels, so any damage or malfunction can impair performance.
Inspecting the Drive Belt
It is a good idea to inspect the KRX 1000 drive belt regularly for signs of damage or excessive wear. Some things to check for include:
- Cracks or fraying in the belt material. As the belt ages and wears down, the material can start to crack or fray. Replace the belt if you notice any damage.
- Glazing or hardening of the belt surface should have a slightly rough, matte texture. If it becomes shiny and smooth, it is glazed and needs replacement.
- Missing or damaged teeth. The belt uses a cog system to grip the pulleys. If any teeth are missing or visibly damaged, the belt will not function properly and will need replacement.
- Excessive deflection. When the belt is running, there should be little slack or deflection in the belt. If the belt is loose or sags significantly between the pulleys, it likely needs adjustment or replacement.
Replacing the Drive Belt
If the inspection reveals the drive belt needs replacement, you will need to remove the old belt and install a new one. To replace the Kawasaki KRX 1000 drive belt:
- Park the vehicle on a level surface and turn off the engine. Allow adequate time for the engine and components to cool.
- Locate the drive belt; it is the large belt connecting the engine crankshaft to the transmission and secondary clutch.
- Loosen the bolt on the secondary clutch to release belt tension. Do not remove the bolt at this time.
- Remove the old drive belt and dispose of it properly.
- Install the new drive belt, ensuring the grooves and teeth align properly with the pulleys.
- Tighten the secondary clutch bolt to the specified torque to apply proper tension to the new belt.
- Start the engine and test drive to ensure the new belt is functioning properly before aggressive riding.
Replacing a worn or damaged drive belt on your Kawasaki KRX 1000 will help ensure optimal performance and prevent more significant drivetrain issues. Performing regular inspections and maintenance will maximize the lifespan of your vehicle’s components.
5) Electrical System Gremlins
The Kawasaki KRX 1000’s electrical system can sometimes exhibit issues that require troubleshooting to diagnose and repair. Several components are involved in providing power to the vehicle, so some detective work may be needed to isolate the problem.
Battery
The battery supplies power to the entire electrical system. If the KRX 1000 won’t start or certain electrical components aren’t functioning properly, the battery is the first place to check. The battery may need to be recharged or replaced if it’s no longer holding charge.
Fuses
Fuses protect the electrical system from power surges and overloads. If multiple electrical components suddenly stop working, check the fuses. The Kawasaki KRX 1000 fuse box is located under the hood. Inspect each fuse for any breaks or burns in the internal wire. Replace any damaged fuses, and that should restore power to the affected components.
Relays
Relays act as switches, controlling the power supply to certain components like the fuel pump, radiator fan, and starter. When a relay fails, the component it operates won’t function. Have the relay tested to determine if a new Kawasaki KRX 1000 relay replacement is needed,
Alternator
The alternator charges the battery and powers the vehicle while it’s running. If the alternator malfunctions, the battery won’t recharge and will eventually drain, causing the KRX 1000 to stall. Diagnose alternator issues as soon as possible to avoid being stranded. In some cases you may have to buy a new KRX 1000 alternator.
Wiring
Faulty or damaged wiring can disrupt power delivery and cause issues throughout the electrical system. Inspect all wiring harnesses and connections for any fraying, exposed, or corroded wires. Repair or replace damaged wiring to restore functionality.
By systematically checking the battery, fuses, relays, alternator, and wiring, you should be able to pinpoint the source of any electrical gremlins plaguing your Kawasaki KRX 1000. Take the time to fully diagnose problems to avoid replacing expensive components unnecessarily. With some patience and troubleshooting know-how, you’ll have your side-by-side electrical system back in working order.
6) Transmission Difficulties
If you experience issues with your Kawasaki KRX 1000’s transmission, there are a few possible problems to investigate.
Faulty Clutch
The clutch transfers power from the engine to the transmission. If it’s damaged or worn out, you may have trouble shifting gears or experience slipping. Check the clutch cable for damage first. If it’s frayed or stuck, replace it. If the cable is fine, the clutch plates themselves may need replacement by a mechanic.
Low Transmission Fluid
The transmission fluid lubricates the transmission and enables smooth gear changes. If the level is low, you may notice grinding noises when shifting, difficulty changing gears or shuddering. Check the transmission fluid level with the dipstick and refill to the proper level if needed. If it’s full but still causing issues, the fluid may need draining and replacement.
Bad Sensors
Sensors monitor various transmission functions and relay information to the ECU. Faulty sensors can disrupt transmission operations. Common symptoms include harsh shifting, delayed acceleration, and the “check engine” light coming on. One of these sensors most often is the transmission speed sensor which isn’t hard to replace.
Worn Gears
Over time, the gears in a manual transmission can wear down, causing problems like noisy shifting, grinding, and gear slippage.
“Unfortunately, the only solution is to have the transmission rebuilt or replaced. It’s best to have a mechanic inspect the transmission to determine if a rebuild or replacement is necessary.” – Sam, author here
Alternatively, the problem can be from worn out wheel bearings and circlips. Before you change the entire transmission, it’s worth checking these and replacing them if needed.
Most Common Transmission Problems
To summarize, the most common transmission difficulties with the Kawasaki KRX 1000 are:
- Faulty clutch components: Slipping, hard shifting
- Low or dirty transmission fluid: Grinding, shuddering, difficulty changing gears
- Bad sensors: Harsh shifting, delayed acceleration, check engine light
- Worn gears: Noisy shifting, grinding, gear slippage
If you experience any of these issues, have your KRX 1000 checked by a certified Kawasaki mechanic as soon as possible to avoid further damage and get back to riding. With regular maintenance and care, your KRX 1000’s transmission can provide thousands of miles of reliable performance.
7) Suspension Woes
If your Kawasaki KRX 1000 is experiencing issues with its suspension, there are a few common problems to check for and solutions to try.
Loose or Damaged Shock Absorbers
The shock absorbers on your KRX 1000 can become loose or damaged over time, causing the suspension to bottom out or handle poorly.
- Inspect the shock absorbers for any visible damage like dents, leaks, or corrosion. Replace as needed.
- Check that the shock absorbers are securely mounted. Tighten or replace any loose mounting hardware.
- For handling issues, you may need to replace the shock absorbers. Consult your owner’s manual for the recommended replacement interval.
Faulty or Stuck Sway Bar Links
Sway bar links connect the sway bar to the suspension and help control the body roll. If the links are stuck, broken, or disconnected, you’ll notice increased body roll and instability when cornering.
- Jack up the KRX 1000 and check that the sway bar links on each side are securely connected and pivot freely.
- Replace any sway bar links that are damaged or stuck. Lubricate or replace bushings as needed.
Uneven Tire Pressure
Incorrect tire pressure can negatively impact your KRX 1000’s suspension performance and handling.
- Check the tire pressure on all four tires with a quality tire pressure gauge.
- Inflate the tires to the recommended pressure listed in your owner’s manual, typically around 15 to 22 psi for most conditions.
- For high-speed riding or with a heavy load, use the maximum pressure listed. For low-speed technical riding, you can drop to the minimum.
Maintaining proper suspension on your Kawasaki KRX 1000 is key to safe handling, control, and an enjoyable ride. By inspecting components regularly, replacing parts when needed, and keeping tires inflated to the recommended pressure, you’ll help ensure peak performance from your suspension system.
The best way to always be prepared to check and inflate your tires is by having a portable air compressor.
8) Brake Pads Wearing Out Prematurely
If your Kawasaki KRX 1000’s brake pads seem to be wearing out faster than expected, there are a few possible issues to investigate.
Aggressive Riding Style
An aggressive riding style with frequent heavy braking can accelerate brake pad wear. Repeatedly slamming on the brakes or riding the brakes for extended periods generates excessive heat that breaks down brake pad material. To increase brake pad longevity, avoid aggressive braking when possible and give the brakes time to cool after heavy use.
Faulty Calipers
Malfunctioning calipers can cause uneven brake pad wear.
The calipers house the brake pads and pistons that clamp down on the rotor. If a caliper is stuck or not operating properly, one brake pad may be doing more work than the other, wearing it down faster.
Have the brake system inspected by a certified mechanic to check for any issues with the calipers. They can test the calipers to ensure even operation and pad-to-rotor contact. Good news is – calipers can be replaced.
Contaminated Brake Pads
Brake pads can become contaminated with oil, grease, or other fluids that damage the pad material and accelerate wear. If brake pads become contaminated, they will need replacement. When installing new pads, thoroughly clean the brake calipers and rotors to prevent recontaminating the new pads.
Faulty Rotors
Warped or grooved rotors can also lead to premature brake pad wear. As the pads rub against damaged rotors, more pad material is worn away.
Have your rotors been inspected, resurfaced, or replaced as needed?
Resurfacing rotors involves shaving off a thin layer to provide a smooth surface for the new brake pads. Severely damaged rotors will need SL-rated full replacement.
By determining the underlying cause of accelerated brake pad wear and taking corrective action, you can maximize the service life of your Kawasaki Teryx KRX side-by-side brake pads and ensure safe, reliable braking performance. Conducting regular brake inspections and maintenance will help identify any issues early on.
My Opinion on the Kawasaki Teryx KRX 1000
“As the owner of the powerful Kawasaki Teryx KRX 1000, you want to ensure this off-road beast continues running at peak performance.” – Sam, author
By being proactive and addressing common problems early, you can avoid costly repairs down the road and keep your adventures going.
Regular maintenance, high-quality parts, and prompt issue resolution will reward you with many miles of thrilling rides across challenging terrain.
Staying on top of potential trouble areas like fuel gauge pump problems, shocks, and brakes will give you confidence when pushing the limits of this machine.
With some TLC and mechanical know-how, the Kawasaki Teryx KRX 1000 will remain the ultimate recreational vehicle for tackling trails and conquering the outdoors.
Keep the rpm high and the repairs low by being vigilant about these common problems and solutions.
Keep Your Engine Healthy
|
Chevron Techron Concentrate Plus Fuel System Cleaner 
Shop Now
|

Shop Now
|
Engine Oil Additive, Engine Treatment, Wear & Tear Protection for Gasoline & Diesel 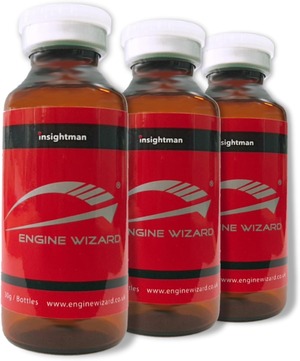
Shop Now
|
FAQs
What type of oil should I use?
My KRX is making a strange noise. What could it be?
How do I clean my KRX 1000?
1) Rinse the entire vehicle with water to remove loose dirt and debris.
2) Wash from top to bottom.
3) Pay extra attention to the radiator and air filter intakes.
4) Rinse and dry the seats, dash, center console, and all interior parts.
5) Lubricate the drive chains to prevent rusting.
6) Avoid using harsh chemicals, abrasive cleaners, or high-pressure washers.
How long do the brake pads last?
Brake pad life will vary depending on riding conditions and style. Typically, the front brake pads will need replacement within 300 to 500 miles. Rear brake pads usually last 800 to 1,500 miles.
For more regarding utility task vehicles visit here and for more guides related to mowers visit Mowers Guide

